|
|
|
|
Products mentioned in this Article
--None--
|
|
|
|
|
|
|
|
|
 |
|
|
 |
Battle Report
Scenario "The Battle For Easy Green"
Pages 26-29 Bloody Omaha.
Continued from Turn 7.
Return to Turns 1 to 6...
Turn 7
US forces
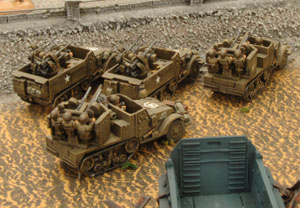
The armoured anti-aircraft-half tracks move towards the beach exit and even manage to recover their one stuck vehicle. However the Sherman DD tank still remains bogged down in the middle of the exit blocking any further progress.
|
|
Boat Section 7 is still having problems with the sea conditions and once more can¹t get a good run at the beach.
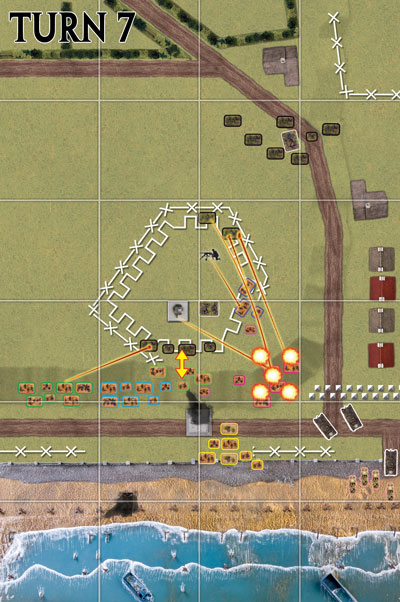
Boat Section 2 advances through the cleared gap in the wire and into WN66. The other platoons advance off the beach and up the bluff towards the enemy positions.
Boat Sections 2 and 6 fire at the Mortars positioned at the rear of the German strongpoint, but they prove well protected. Some Boat Section 6 teams don¹t fire and set about gapping the minefield next to the anti-tank obstacles.
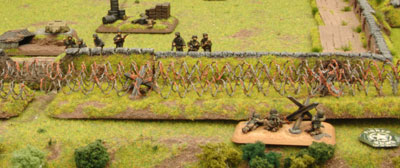
Meanwhile Boat Section 3 fires on the 1st Grenadier Platoon with no noticeable effect. Boat Section 5 clears the wire directly in front of the positions of the 1st Grenadier Platoon, they then rush into the trenches to assault the Grenadiers. A withering hale of fire from the Grenadiers and Tank Turret bunker pins the Americans before they make contact.
|
 |
 |
Boat Section 5 loses three teams during the rush. They fail their Motivation test for being below half strength. Dale now receives another Boat Section (8) that can return to the table from the beginning of next turn.
Dale's Player comments: Another flame-thrower moves forward and flames the German entrenchment, but there are still some defenders left. I pin the front bunker with 60mm Mortar fire, but fail to assault because of back bunker again.
|
|
One boat section removes the barbwire on the fortification right side ready to move in. Sherman's at last destroy the last HMG bunker on right flank, but can't advance because of anti-tank obstacle blocking their way.
German forces
To counter the threat of Boat Section 2's penetration of WN66 the Grenadier's Platoon Command team moves along the trench to fire his SMG at the substantially reduced American platoon. He's joined by the one remaining HMG bunker positioned at the rear of WN66, the Tank Turret bunker, and the Mortars. The combined fire pins Boat Section 2 and knocks out two teams, one of which is the Platoon command.
|
|
Turn 8
US forces
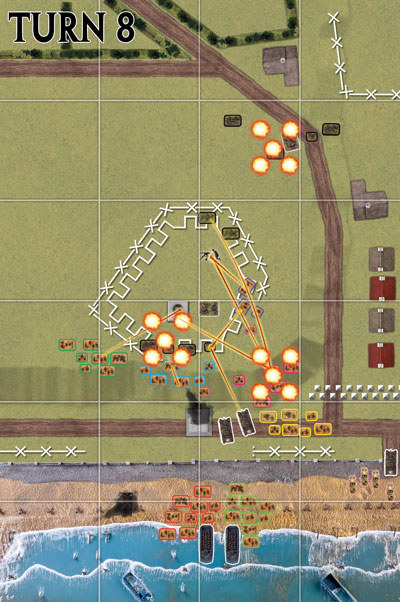
Boat Section 2, despite the casualties, rallies from pinned. Not so for Boat Section 6 who stay pinned and are generally unenthused about advancing on the German positions. The Sherman DD tank is well and truly wedged into the defile, blocking the AA half-tracks for another turn.
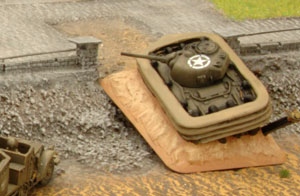
The other DD tanks move down the seawall to the knocked out bunker to give better covering fire to the troops attacking WN66. Boat Section 4 moves across from the left to move into the gapped wire created by Boat Section 5 before their demise. Boat Section 3 move up the bluff on to the corner of WN66 where they prepare to gap the wire next turn.
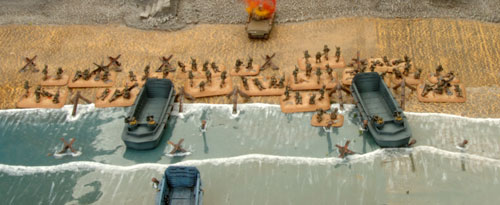
Both Boat Sections 7 and 8 land and disembark from their LCVPs on the centre of the beach, behind the knocked out bunker.
|
 |
 |
Boat Section 4, including their flame-thrower, fires on the Grenadiers with little effect. The flame-thrower misses and is removed from play.
Boat Section 3 drops fire from their 60mm Mortar on the Tank Turret bunker and pins it, limiting any defensive fire it may have in the Assault Step.
|
|
Boat Section 6 also uses its 60mm Mortar to try and take out a bunker. They drop some rounds on the last remaining HMG bunker, but don't pin them.
The Grenadiers in WN66 come under fire from Boat Section 2 who split their fire between them and the HMG bunker. There fire has little effect.
The artillery drops a barrage on the front of WN66, catching the Grenadiers, Tank Turret bunker and some teams of their own platoon Boat Section 4. It pins the bunker again (to no further effect) and destroys one of Boat Section 4's teams.
The Naval bombardment drops on the 2nd Grenadier Platoon on the rear objective. In a devastating wave of explosions the barrage takes out three Grenadier teams and pins down the German unit.
|
 |
|
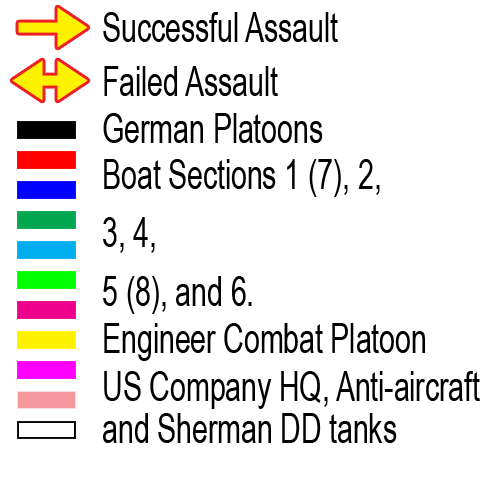
Dale's Player comments: Naval and floating artillery fire shifts to the back of board with the arrival of the German reserve. I fail to pin the back HMG bunker again! I did get a small boat section into the fortifications ready to assault the HMG bunker.
German forces
The 2nd Grenadier Platoon fails to unpin and remains in their positions gone to ground.
After unpinning the 1st Grenadier Platoon opens fire on Boat Section 4 and knocks out a team. The Mortars and the Tank Turret bunker fire on Boat Section 6 and destroy a Bazooka team.
|
 |
Turn 9
US forces
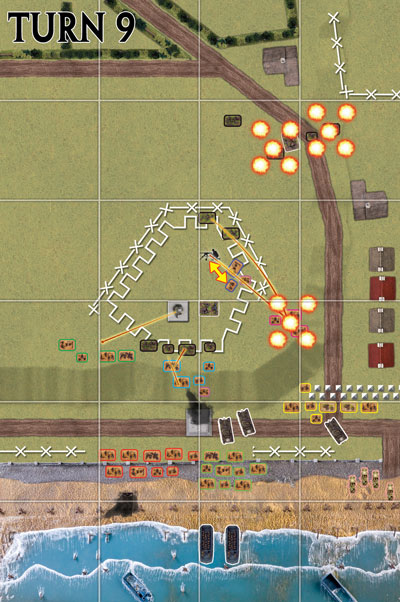
The Sherman stuck in the beach exit final unbogs. This allows it and the following AA half-tracks to get off the beach. Boat Section 6 unpins with a bit of encouragement from the Company Commander.
Boat Sections 7 and 8 move up the beach to the seawall, while Boat Section 2 moves towards the positions of at the rear of WN66.
Boat Section 3 clears two sections of the barbed wire from the left-hand corner of the German strong point WN66.
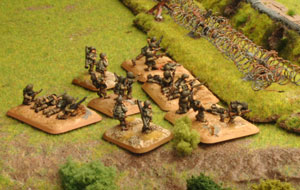
Both the artillery and Naval guns fire on the rearward 2nd Grenadier Platoon and fail to knock out any teams.
|
|
Boat Section 4 fires on the 1st Grenadiers and Boat Section 2 fires on the rear positioned HMG bunker, both platoon are unable to cause any casualties.
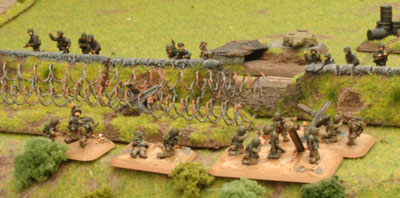
Despite its ineffective fire Boat Section 2 pushes on with an assault against the HMG bunker (under the command of the 2iC). The HMG bunker's defensive fire, aided by the Tank Turret bunker, are able to pin the incoming Americans. The attack grinds to a halt and Boat Section 2 loses another team.
|
 |
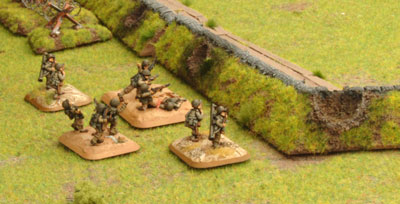 |
Dale's Player comments: The engineers move into contact with anti-tank ditch ready to fill it in (looking at the rule book realise I need a dozer or a supply truck).
The Shermans and AA platoon can¹t cross the obstacle. Naval and floating artillery continue to bombard the back platoon.
|
|
German forces
The Germans set about dragging as much fire as they can on the American platoon now swarming all over the WN66 strong point. The Mortars and HMG bunker fire on Boat Section 6 on the right flank of the defences, behind Boat Section 2, destroying three teams. The 1st Grenadiers fire on Boat Section 4 to their front and destroy two teams and Boat Section 3 is fired on by the Tank Turret bunker, which manages three kills from its four hits.
This hail of fire reduces Boat Sections 3, 4 and 6 below half strength. All three platoons pass their Motivation tests.
Mike's Player Comments: The later parts of the battle featured the last 3 then 2 and finally 1 stand of grenadiers supported by the tank turret and HMG bunker valiantly holding off repeated assaults from the American infantry. Meanwhile the reinforcement platoon moved up and dug-in on the back objective. Only to have 3 of its stands killed by 1 devastating round of 16" naval gunfire. Fortunately repeated naval and 105 shelling failed to get the vital next stand, so no Motivation test was needed.
|
|
Turn 10
US forces
Boat Section 6 unpins so it can continue its rush for the rearward objective. Boat Section 2, having been pinned during its attempted Assault, is not so keen to carry on.
The Company 2iC joins Boat Section 4 and drags the remaining few teams forward.
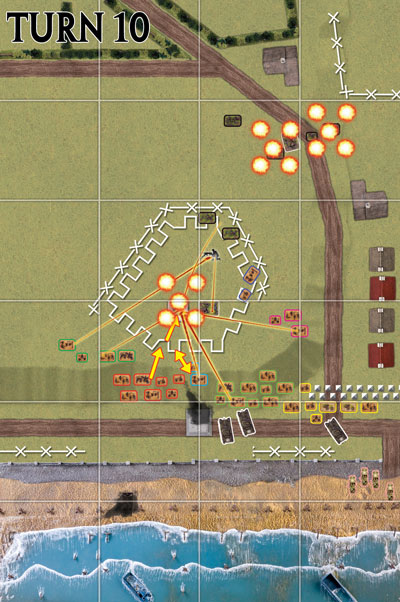
Boat Sections 7 and 8 now advance into the fray. Boat Section 7 fires its flame-thrower at the remnants of the 1st Grenadiers, destroys a team and pins them. Boat Sections 3, 4, 6 and 8 concentrate fire on the Tank Turret bunker
and pin it as well. Boat Section 3's remaining unfired teams shoot at the HMG bunker to the rear of WN66 and pin it down.
The Company Command joins the 2iC with Boat Section 4 and Assaults the Grenadiers with the two command teams and a Bazooka. Defensive fire from the Grenadiers, HQ teams and Tank Turret bunker knocks out the 2iC team. The Assault proves unsuccessful and the Company Command team is also killed during the German counter-attack. The Bazooka breaks off and joins the 60mm Mortar that represents all that remains of Boat Section 4.
Boat Section 7 quickly follows in behind the failed Boat Section 4 and attacks the Grenadiers, their 2iC team and the Tank Turret bunker.
|
 |
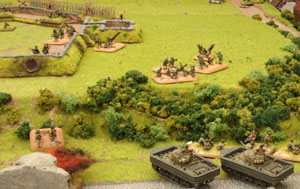 |
The Germans unleash another torrent of defensive fire and knock out another two enemy teams. However, Boat Section 7 pushes through and assaults the German defenders. They destroy the last Grenadier team and punch through the trench line to assault the Tank Turret bunker. The Tank Turret fires once again, but in the confusion of the melee can't pick out the enemy teams. A few well-placed grenades soon deals with the bunker and Boat Section 7 moves on to the objective.
The 2iC is captured and the 1st Grenadier Platoon is wiped out.
Dale's Player comments: I finally clean out the Grenadier and Tank Turret bunker
|
|
Naval and floating artillery fire continues to rain down on the back platoon, but I can¹t seem to kill any further teams.
German forces
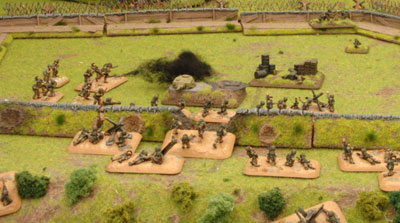
All that remains inside the WN66 strong point is the HMG bunker and the HQ Mortar section. They fire on the advancing Boat Section 7, pin them, but fail to cause any casualties.
The 2nd Grenadier Platoon wisely goes to ground.
|
 |
 |
Turn 11
US Forces
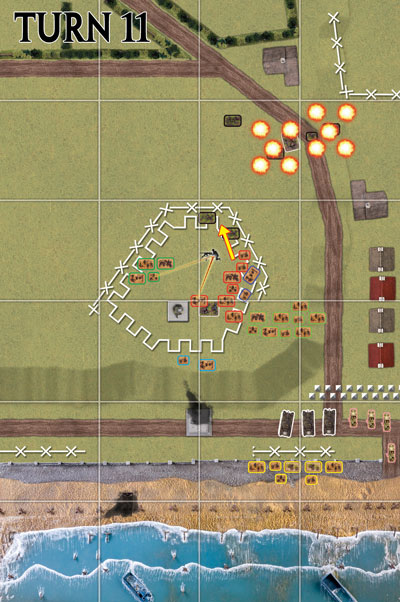
This is the last chance to get victory for the Americans. The must hold both objectives by the beginning of their turn 12 to get a 5-2 victory, failure to do so will result in a 4-3 victory to the Germans, despite the fact that
they own the front objective.
As he sees no further use for them Dale returns Boat Section 6 to the floating reserve. He also retires his Engineers out of the firing line.
Boat Sections 3, 7 and 8 press on through WN66 to clear the last of the defenders. The all fire on the Mortars and HMG bunker, with a 60mm Mortar team taking out the HMG bunker. The Artillery and Naval guns drop barrages on
the 2nd Grenadier Platoon, but neither manages to destroy any of the Grenadier teams.
Boat Section 7 launches one final assault on the Mortars. Both are destroyed in the ensuing melee.
German forces
Mike fails again to unpin his 2nd Grenadier Platoon and they remain gone to ground around the objective.
|
|
Turn 12
As the US forces haven¹t taken the rear objective by turn 12 the German Gain a 4-3 victory.
Dale just didn¹t have his troops far enough forward towards the end of
the battle, tenacious defence by the Germans and some unlucky
un-pinning rolls keep him from advancing faster. It was however a close
run thing.
|
 |
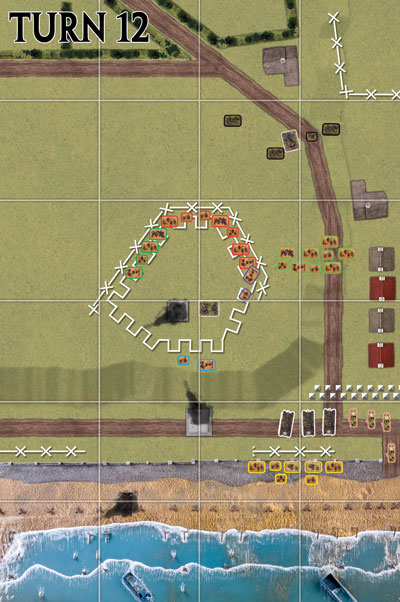 |
Dale's Player comments: The infantry advance though the fortification towards their last platoon, but are still over 30cm away from them! Naval and floating artillery keep up their fire to no avail.
The game finishes at the start of turn 12. As I'd only captured the front objective it is a 4-3 victory to Mike and his Germans.
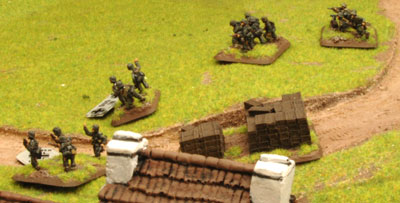
Mike's Player Comments: In the last 2 turns the Grenadiers in WN66 died to a man allowing the American infantry to mop-up the tank turret, then HMG bunker, before assaulting into the 8cm mortars at the back on WN66. The battle finished with 4 out of 7 teams dug in on the back objective and Boat Sections 7 and 8 advancing towards them as time ran out. The DD Shermans with the SP AA were trapped near the beach by the still intact anti-tank obstacle.
Post-Game Comments:
Dale
Looking back on the game I made four mistakes.
Mistake 1: I bunched up too much on the beach and was having multiple platoons come under the artillery templates from the Rockets and mortars. And I advanced just into rifle range (e.g. to within 38cm of them).
|
|
Mistake 2: Once I reached the bluff I should have keep going and not waited for more troops. I would have suffered casualties, but I could have hit them back easier and with more.
Mistake 3: The engineers should have been deployed on the far right, so with drift they would have been right in front of anti-tank obstacle, instead of half way down the board getting shot up by everything.
Mistake 4: Since they did deploy half way down they should have started to move sooner to get to the anti-tank obstacle, as it was they didn't start to move till turn 6. Even though pinned they could have moved earlier since
they would not be moving towards the enemy.
If I'd done these things I think I could have won, as the tanks would have been in the enemy rear area to meet their reserves coming on and to support the boat sections assaulting into the fortifications.
Even if I didn't win it was a great game fighting my way off the beach. Good luck with your beach landings!
Dale
Mike
Over all the pre-game plan worked, the loss of the Sherman dozer, the heavy losses and three turns pinned down stopped the engineers being effective, which neutralized the mechanized American units. Somewhat unlucky un-pinning Motivation tests combined with ferocious forward defence at WN66 slowed the American infantry just enough for me to hang on for the win!
Mike
|
Last Updated On Tuesday, June 26, 2007 by Wayne at Battlefront
|
|
|