|
|
 |
Crafting Soft-Edge Camo on a German Sd Kfz 251 Part II
by Rubén Torregrosa
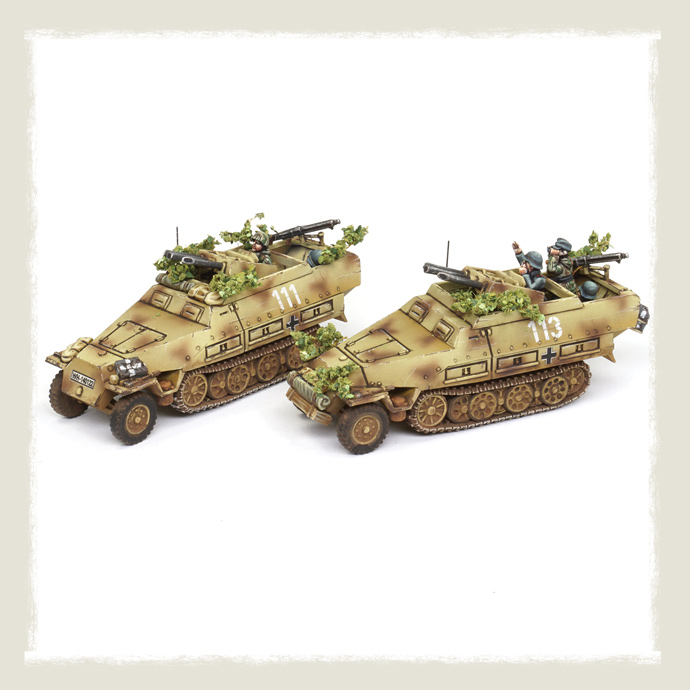
In the previous article, we covered how to paint the basic color of the German half-track and apply a soft-edge camouflage using the airbrush. Now, we will bring the vehicle to life by applying a dark wash to all the recesses, adding chipping effects, and using pigments to simulate dust. Additionally, we will create a simple yet effective foliage camouflage. The techniques covered in this article can be applied regardless of the painting technique used until now. They are completely compatible with simpler approaches for the base color and camouflage, including the drybrush technique or just a plain color.
|
|
Step 1: Dark Wash (Enamel)
|
|
So far, we have used acrylic paints, which dry in seconds and can be thinned with water. Now, we will switch to enamel paint. This type of paint, like oils, dries in hours and requires a solvent such as turpentine for use. Although these properties might seem disadvantageous (well, they are), the significant advantage of enamels over acrylics is the ability to easily remove excess paint, which is crucial for this step. Acrylics, once dry after a few seconds, cannot be removed.
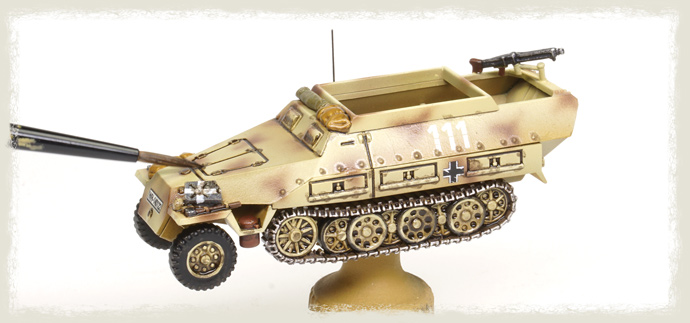
Following this approach, we use a dark brown wash, such as Dark Brown Wash for Green Vehicles A.MIG-1005, to apply a pin wash. This involves applying the dark wash exclusively to the recesses using a thin brush. While we can remove any excess wash later, the cleaner we are at this step, the quicker and easier the next steps will be.
|
|
|
|
Step 2: Removing the Excess Wash
|
|
After waiting 30-60 minutes for the enamel wash to partially dry (it will fully dry after several hours), we remove the excess wash using a brush or cotton swab moistened with Enamel Odourless Thinner A.MIG-2019. We do this gently, avoiding the removal of paint from the recesses. To achieve this, we rub the surface in the opposite direction of the recesses when possible. It doesn't need to be perfect; we just need to create some contrast.
|
|
Step 3: Sealing with Flat Varnish
|
|
Optionally, we can use a thin brush and an acrylic dark brown paint to touch up areas where we have removed too much wash or where the details are not deep enough. This helps to enhance definition and cleanliness, but it is not compulsory. Otherwise, we eliminate the glossy effect by applying a couple of layers of Ultra-Matte Lucky Varnish A.MIG-2054.
|
|
Step 4: Chipping Effects I
|
|
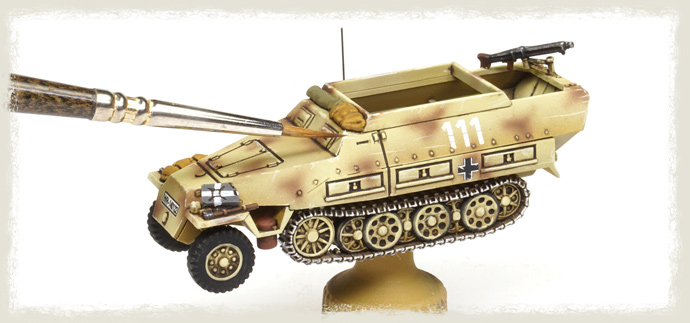
We create chipping effects in two steps. First, we use a light color to represent superficial chipping effects and scratches, and then a dark brown to simulate deeper ones, exposing the bare metal underneath. We start with the former. Using the lighter color from the color modulation (40% Dunkelgelb ATOM-20012 + 60% Matt White ATOM-20000) and a thin brush, we paint small dots and lines primarily on the edges and some long lines representing scratches on the vertical surfaces.
|
|
|
|
Step 5: Chipping Effects II
|
|
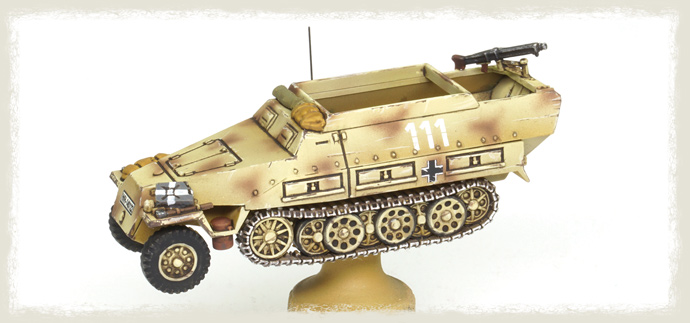
We repeat the same process using a dark brown, such as Chipping ATOM-20064. The idea is to place the dark color inside or around the light chipping effects to give them volume and create a three-dimensional effect. However, we will preserve some of the light chipping effects without the dark tone to add variety. When applying chipping effects, it's crucial to control the size and number: these effects should be super small and thin, and we should not cover every single edge of the vehicle. The more variety, the better.
|
|
|
|
Step 7: Pigments
|
|
The best tool to create dust effects is pigments, which are essentially colored powders. While you can use any given color directly, it is advisable to mix a few shades to create a richer blend. Pigments, unlike regular paints, do not completely merge, maintaining their individual colors even in a complex mix. This results in a more interesting and realistic effect. Depending on the result we are looking for, we mix the corresponding pigments.
|
|
Step 8: Pigment Wash
|
|
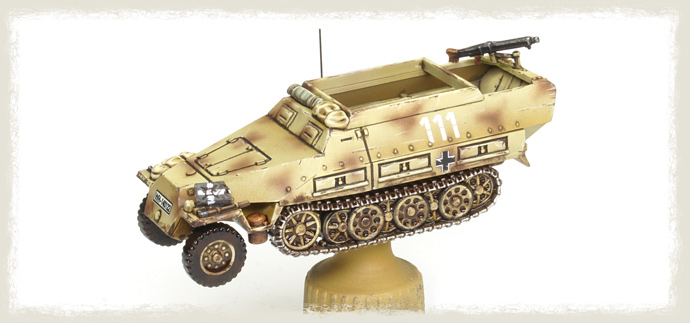
Pigments can be applied in two ways: dry, directly from the jar, or wet, suspended in water or thinner. The dry method is ideal for creating superficial dust effects, while the wet method can create accumulations in recesses. Here, we aim for the latter, to accumulate dust on the tracks and wheels. To do this, we mix the pigments with 50% Enamel Odourless Thinner A.MIG-2019 and apply the wet pigments as a wash over the tracks, wheels, and lower part of the hull.
|
|
|
|
Step 9: Remove Excess of Pigments
|
|
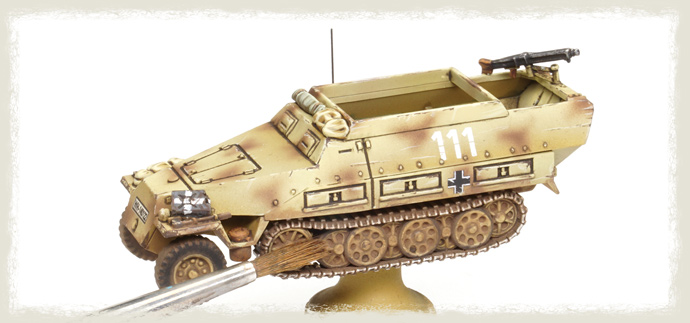
We let the pigments dry completely for several hours or overnight, allowing them to regain their dusty and ultra-matte appearance. Then, we use a brush to gently rub the surfaces, removing the excess pigment and spreading it over the exposed parts (note that when applying the wet pigments, we accumulated them in the recesses, avoiding the more exposed areas). For a more pronounced effect, especially on the wheels where we want the pigment to gather in the detailing, we can remove a larger portion of the pigment using a finger.
|
|
|
|
Step 10: Crew
|
|
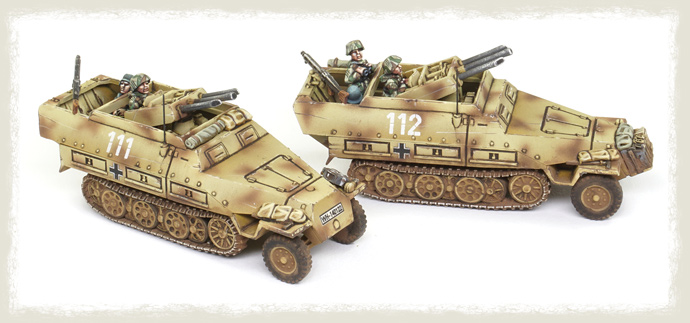
The half-track is ready, and it is time to paint the crew. For this, you can use your favorite painting technique for figures, such as Painting WWI French Fusiliers: Combining Quick Washes and Advanced Layering. Once ready, we fix the crew in place using instant glue. When painting platoons, it is important to vary the positions of the crew members in each vehicle to add variation. Here, I also added a third crew member in some half-tracks, seated on the bench.
|
|
|
|
Step 11: Foliage Camouflage I
|
|
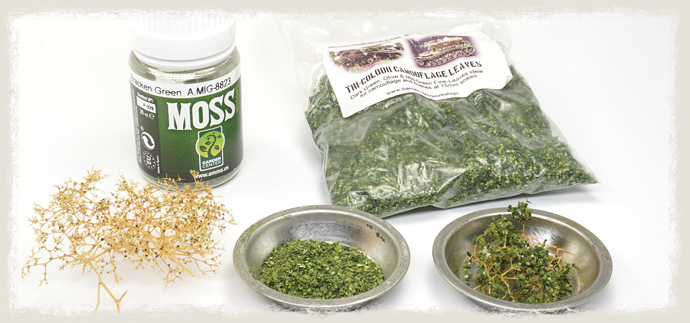
Although our half-tracks are now finished, we can optionally add 3D camouflage in the form of foliage. This was a common method of rapid camouflage, using branches from trees or bushes. To simulate this in a tiny scale, we need to use appropriately small materials. To create the skeleton of the branches, we can use Teloxys aristata (sometimes called sea moss or sea foam), which is commonly used in train scale modeling. For the foliage itself, we can use various small-grain products, including tiny scale model trees and products designed to simulate moss in larger scales. It is important that whatever we use as leaves or foliage is very small and appropriate for 15mm miniatures.
|
|
|
|
Step 12: Foliage Camouflage II
|
|
First, we apply a little bit of PVA glue to a small branch of Teloxys aristata, then sprinkle the foliage on top. We create a lot of these and let them dry. Once dry, we select and, if needed, cut the branches to the desired shape or size using modeling cutters. Little by little, we build the foliage camouflage on the vehicle, using PVA glue to fix the branches in place. As we have done before, we will aim to create different patterns on different vehicles to add variation and maintain the individuality of each team in the platoon.
|
Last Updated On Monday, January 1, 0001 by Kevin
|
|