|
|
|
|
Products mentioned in this Article
--None--
|
|
|
|
|
|
|
|
|
 |
|
|
 |
Crafting Soft-Edge Camo on a German Sd Kfz 251
by Rubén Torregrosa
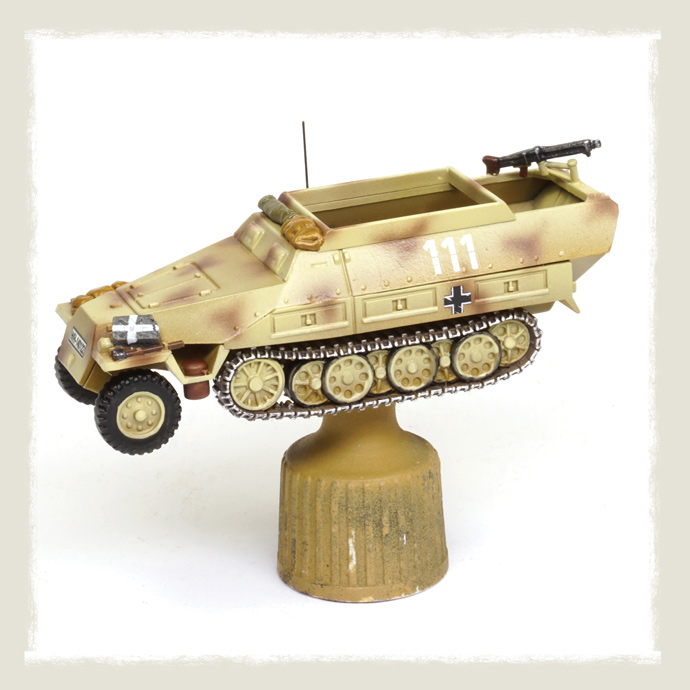
In this new article, we will explore how to create a soft-edge camouflage using an airbrush. Previously, we discussed how to paint hard-edge camouflage using masking putty (Unlocking the Enchantment of Highlights: Creating Contrast in 15mm Vehicles). Here, we will apply the camouflage spots directly with an airbrush to achieve a soft or blurry edge. This technique means we won't be able to add highlights or shadows to the camouflage spots, which will partially reduce the high-contrast effect we aim for when painting 15mm vehicles. However, this is precisely the purpose of camouflage: to blend the vehicle with its surroundings! For this purpose, we will paint a platoon of 6 drilling Sd.Kfz.
|
|
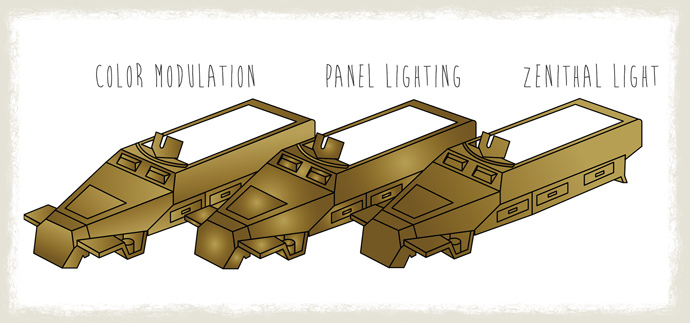
We will again apply an elaborate highlight system to the basic dark yellow of these German vehicles, known as color modulation (refer to the previous guide). This technique will help create contrast and partially compensate for the flat green camouflage spots applied on top, as the shadows and highlights on the dark yellow will still create some volume. There are other simpler options, such as classical zenithal lighting (imagine a single light source above the miniature, like the sun). However, I find the unrealistic results of color modulation more beneficial when painting 15mm vehicles, as it helps them stand out.
However, this is not compulsory. You can follow this guide using any other highlighting system, including a simple drybrush or even a plain color (if you decide to use this last option, it is advisable to use a slightly lighter color than the real one to compensate for the small size of this vehicles).
|
|
|
|
Step 1: Preparation
|
|
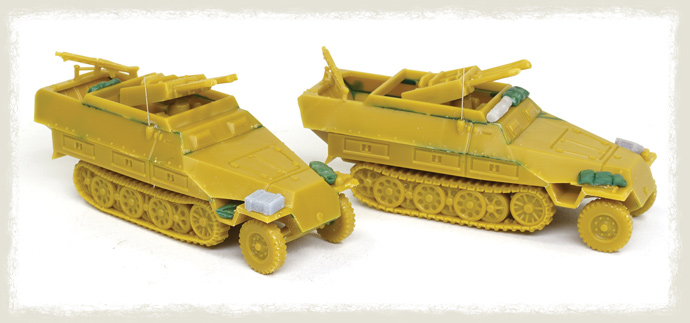
After carefully cleaning each plastic piece, we assemble them using plastic cement. I used a colored glue (Night Blue Cement A.MIG-2045) to help see where and how much glue is being applied, and to detect any gaps that might need to be filled with modeling putty. When painting a platoon of multiple vehicles, it's a good idea to customize them a bit to make each one unique. I used 3D-printed boxes, jerry cans, and rolled tarpaulins, and sculpted blankets with green stuff. Additionally, we can add antennas using a 0.2mm nickel-silver rod (Albion Alloys) fixed with instant glue.
|
|
|
|
Step 2: Primer
|
|
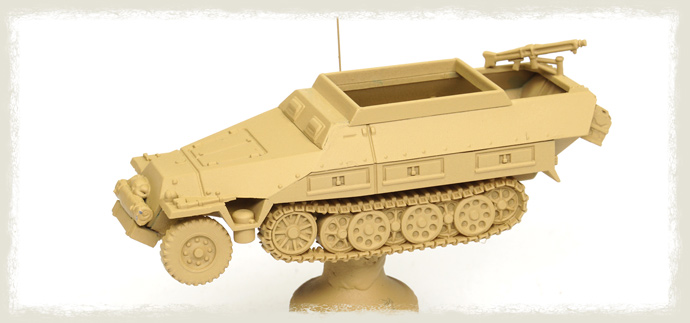
Once the plastic kits are fully assembled and customized, we apply the primer or undercoat. This step is essential as it facilitates the application of paint and increases its durability. Since we are painting the halftracks in dark yellow, we use a similar color for the primer. A spray can, such as TITANS Desert Yellow Primer TTH111, works well for this purpose. Although it's not the exact color we need, it will be much easier to cover later with the correct color. Starting with a black or white undercoat would require multiple layers of the base color to achieve an even surface.
|
|
|
|
Step 3: Dunkelgelb Shadow
|
|
The Germans painted their tanks in dark yellow at the factory after 1943, with the camouflage spots (green or brown) often applied by the crews themselves. Following this method, we start by painting the entire vehicle in dark yellow. We begin with a darker shade than needed to serve as the "shadow." For example, we mix 80% Dunkelgelb ATOM-20012 with 20% Chipping ATOM-20064 and evenly cover the entire vehicle using an airbrush.
|
|
Step 4: Dunkelgelb Base
|
|
Next, we apply the base color, pure Dunkelgelb ATOM-20012. Using the airbrush, we begin creating the color modulation by painting highlights individually on each large panel to achieve high contrast. This involves placing the maximum highlight of one panel adjacent to the maximum shadow of another.
|
|
Step 5: Dunkelgelb Light
|
|
We apply a single highlight using a lighter color, for example, by mixing 80% Dunkelgelb ATOM-20012 with 20% Matt White ATOM-20000. This highlight is applied to the previously highlighted areas, but with a reduced coverage area. It is essential that all layers and colors remain visible in the final result.
|
|
Step 6: Dunkelgelb Shadow
|
|
The color modulation is completed using a brush. The final step involves using an even lighter color, mixing 40% Dunkelgelb ATOM-20012 with 60% Matt White ATOM-20000. This mixture is used to paint all the small details, such as rivets, wrinkles, and upper edges.
|
|
Step 7: Brown Soft-Edge Camouflage
|
|
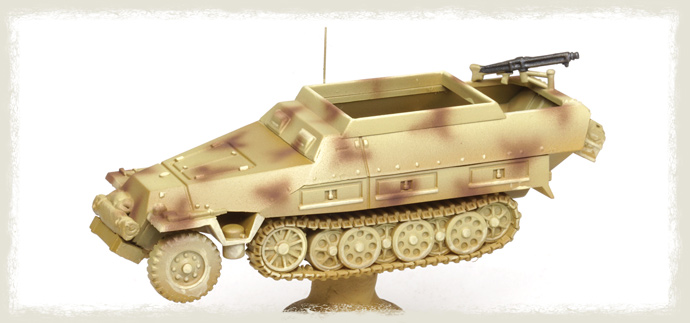
Once the base color is ready, we can apply the camouflage spots. I decided to paint a simple camo with brown spots. When painting this type of camo, we must dilute the paint with at least 40% acrylic thinner to create a semi-transparent mixture that gives us more control over the intensity. Then, using an airbrush set to a pressure of 2 bars (60 psi), we paint random spots here and there. Instead of painting small circles or dots, we aim to create irregular shapes, thinking of patterns similar to letters like X or Y. It is advisable to test the dilution and our skills on a piece of paper before applying the paint to the vehicle.
|
|
|
|
Step 8: Details
|
|
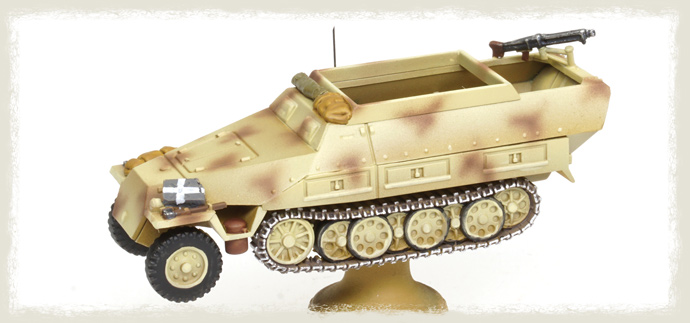
Next, we paint the remaining parts of the vehicle using a brush and paint thinned with 20% water to facilitate application. We use pure black for the wheels and the rubber of the tracks, while the tracks are first painted with a 1:1 mix of Zimmerit ATOM-20144 and Chipping ATOM-20064. Once dry, we apply a drybrush with Dio Drybrush Light Metal A.MIG-0621 to create a metallic shine. Similarly, the MG is painted, starting with black. For the blankets and tarpaulins, we use different shades of brown, while for the jerry can in this example, we use Dunkelgrau and then paint a white cross to indicate it contains water.
|
|
|
|
Step 9: Decals and Sealing with Glossy Varnish
|
|
Now, if desired, we can apply decals before adding the weathering effects. We have previously explained the decal application process (see "How to Apply Decals"). To protect the decals and prepare the surface for weathering effects, apply a couple of thin layers of glossy varnish, such as A-STAND Aqua Gloss Clear A.MIG-2503. The glossy varnish creates a smooth and polished surface, ensuring optimal application and distribution of the wash.
|
|
Part One Conclusion
|
|
In the next part of the tutorial, we will dive into creating simple weathering effects, as previously discussed, and also how to create foliage camouflage.
|
Last Updated On Tuesday, July 30, 2024 by Kevin
|
|
|