|
|
|
|
Products mentioned in this Article
--None--
|
|
|
|
|
|
|
|
|
 |
|
|
 |
2. Marine-Grenadierdivision
By Alexander Costantino
By January 1945 the German army was desperately short on manpower. On 20 January 1945 it was decided that 20,000 members of the Kriegsmarine (Navy) would be transferred to Denmark to free up 22 army replacement battalions to be deployed on the eastern front. Then nine days later Großadmiral Donitz requested that instead of being incorporated into the army these men would be used to form several naval divisions, and Hitler agreed.
These men were of good quality and morale with the average age being only 20 years old. The second division to be formed for the Kriegsmarine recruits was 2. Marine-Grenadierdivision. Its initial reported strength was around 10,000 men. These men were organized into three infantry regiments as well as a fusilier battalion. Divisional support formations included an artillery regiment, a panzerjäger battalion with 7.5cm Pak40 anti-tank guns, a pioneer battalion, and other standard supply and signal troops.
|
|
Due to chronic equipment shortages the division was not ready for deployment until April. By the time they were fully equipped the situation on the western front had become dire. The Allies had breached the Rhine defences and surrounded Model’s Army Group B. On 31 March 1945, in light of this, Hitler agreed to assign the division to Heersgruppe H, commanded by Kurt Student. Student had the Marines facing what was expected to be the main British thrust aimed at capturing key bridges over the Weser and Aller rivers.
The Marines began deploying on 4 April 1945. Upon their arrival small delaying forces were deployed to defend the Weser. The only heavy fire support the Marines had available at the time were the heavy and light flak guns from Flakregiment 122(E) (Railway Anti-aircraft Regiment). The rest of the division was left to defend the Aller.
|
 |
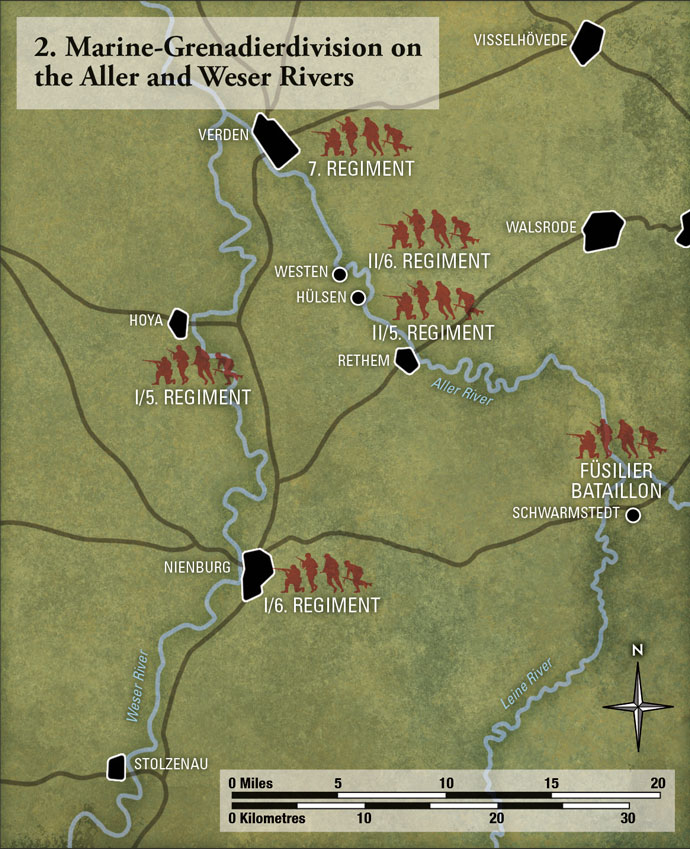 |
After taking the city of Leese from the 12th Hitlerjugend SS training battalion, the British 11th Armoured Division struck north and headed for Nienburg where a battalion of Marines were stationed. South of Nienburg at the village of Husum a company of Marines from the 1st Battalion, 6th Regiment, were the first to receive their baptism by fire.
The very next day the Marines who were stationed in and around the town of Hoya on the Weser were attacked by the 53rd Welsh Division. At 0900 the British, under cover of artillery, made their assault across the river. Initially the crossing was unopposed, but later took heavy fighting to consolidate. By the end of the day the British were completing operations to bridge the Weser.
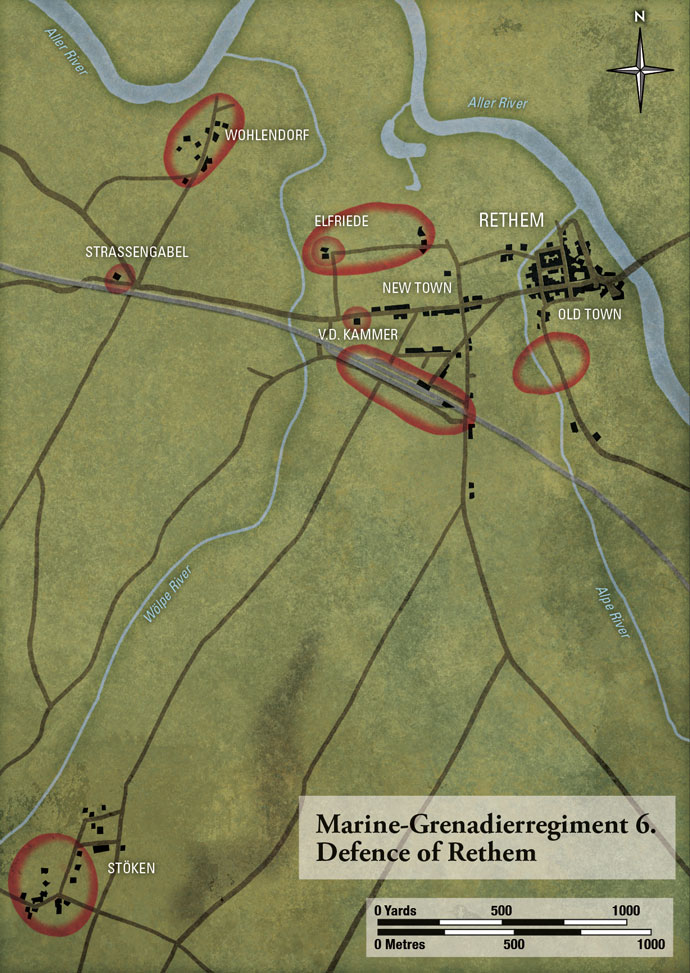
Kapitan Zur See Herman Jordan, who commanded the 5th Marine Infantry Regiment at Rethem, decided that the town was to be defended in two layers. The first layer would consist of strongholds based around flak or anti-tank guns while infantry in platoon or company strength would be placed in the surrounding villages and hamlets to block the main routes into the city. |
|
The company dug-in at the railway station had in support 10.5cm Flak 39 anti-aircraft guns on railway flatcars along with a number of light flak guns.
On the morning on 10 April the British 53rd Welsh Division began their advance on the Aller. The initial British advances to their main objective, the town of Rethem, were pushed back by a torrent of fire from the defending Marines. Several Welsh companies from the 1/5th Battalion were pinned down or thrown back in the initial foray. Later in the day the British switched their focus from Rethem to the surrounding outposts. They were able to overwhelm the Marine’s two outermost strongpoints in bitter fighting during which the Marines exacted heavy casualties on the British for every inch of ground given. With daylight running out the British, with the assistance of a number of artillery batteries, again attempted to seize Rethem. This attack meet much the same fate as their other attempts on Rethem, it was pushed back by machine-gun fire from the remaining outposts.
|
|
The next attack mounted by the British on Rethem was done under the cover of darkness on the night of 10/11 April. It was hoped the darkness would allow the British to advance over the open ground close enough to overwhelm the Germans. This plan started off well as the two leading companies advanced without drawing any fire. As soon as the British reached the outskirts of Rethem, the Marines manning the remaining strongpoints opened up with murderous fire. The British were close enough to engaged the Germans in hand-to-hand combat. Never-the-less the Marines held on.
In light of the heavy fighting of the previous day, the British assigned a new battalion to attack Rethem, the 2nd Battalion, Monmouthshire Regiment. To assist a squadron of Cromwell and Firefly tanks were allocated to the attack as well as air and artillery support. The attack started off quietly, but escalated into a firefight that saw the British pinned down by overwhelming German fire. By the end of the day little progress had been made and the British disengaged. The road bridge at Rethem was also destroyed during the fighting.
|
 |
|
Kapitan Zur See Jordan was, however, down to about 200 able bodied Marines from his original 600. He knew they would not be able to resist the next British attack, so on the night of 11/12 April he withdrew the battered battalion back across the Aller having successfully denied the British the town’s bridge.
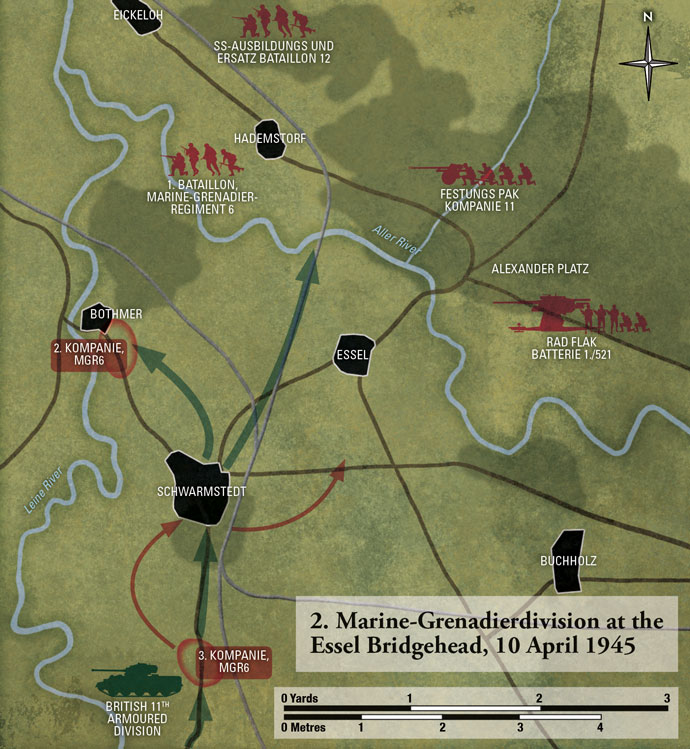
On the Marine division’s southern flank the Fusilier battalion came into contact with the enemy on 10 April. The British had determined that the way to secure a bridgehead across the Aller was to advance the 1st Commando Brigade during the night and capture a rail bridge near Wesel. In the waning hours of 10 April the Commandos set off, and due to an incomplete demotion of the railway bridge at Hademstorf, the British were able to get a small foothold across the Aller.
|
 |
|
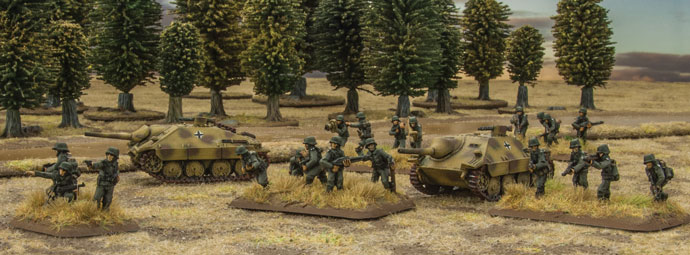
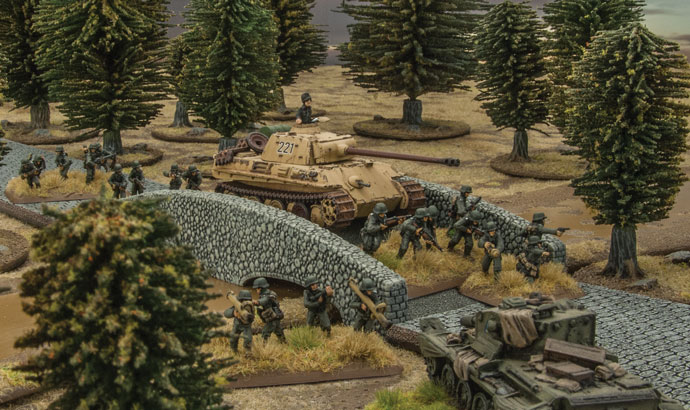
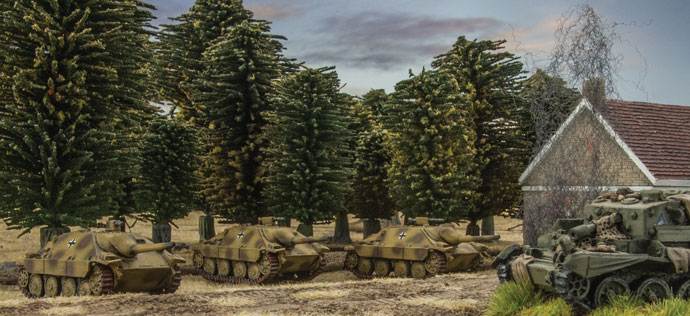
The Marines counter attacked the British thrust using the dense forest as cover for their advance and were only beaten back by artillery fire. The Commandos then launched a daring charge into the German positions defending the road bridge manned by men of the two Festungs PaK (fortress anti-tank) companies and overwhelmed the German defenders. This meant that the British could now use the bridge to bring both tanks and more men into the fight. This bridgehead was subjected to another counterattack from Marines supported by two Hetzer tank-hunters. This was eventually forced back by artillery fire.
The next day the British consolidated their troops on the eastern bank of the Aller at Wesel to defend the road bridge they had won the day before. The Germans reinforced the defence and sent a lone Tiger, numbered F02, to block the main road leading out of the bridgehead. The British then tried to break out of the bridgehead by sending armour up the main road, but were met by the Tiger. The Tiger destroyed a Comet and a scout car before the British disengaged.
|
 |
With the bridge at Rethem destroyed, the 53rd Welsh were forced to look elsewhere for a crossing point. On the night of 11/12 April the 4th Battalion, Welch Regiment began crossing at the town of Westen about 8km north of Rethem. This crossing was successfully made with only light resistance met in the darkness. The Hungarians defending the bridge were easily overcome by the British and it was not until the morning that the Germans were able to move up reinforcements.
|
|
The British then fought their way into Otersen which secured their bridgehead by midday. Then the British began to attack south along the Aller, quickly overcoming or bypassing any German resistance. The British had made substantial gains by nightfall, but were stopped by a determined Marine resistance at Gross Hauslingen about 6km south of their bridgehead.
The next day several British infantry companies from the battalion engaged at Gross Hauslingen bypassed the Marines to attack the town of Altenwahlingen, on the opposite bank of the Aller from the now captured town of Rethem. Two companies of Marines were available to defend Altenwahlingen, supported by four 10.5cm Flak39 anti-aircraft guns. The ensuing fight began in pitch black, but British Wasp flame-throwers soon illuminated the battle as they burned their way through the town, gradually forcing the Marines back.
|
|
13 April also saw action at the Wesel bridgehead with the British attempting to expand their foothold across the Aller while further bridging operations were conducted. The 46th Royal Marine Commando (RM) attacked the city of Hademstorf to the west and drove the German defenders out. Another attack was mounted to the north along the road defended by Tiger F02. The Comets of the 29th Armoured Brigade were finally able to destroy the Tiger. Despite this success, they still met fierce resistance from the SS troops defending the road. During the remainder of the day the Germans reinforced this position with a battalion of men from the newly arrived Kampfgruppe 'Grosan' (Battle Group Grosan), which also included two of the battle group's Tiger tanks. These Tigers proved a nasty surprise for the 6 pdrs and Comets that came across them during the remainder of the day. The spirited resistance shown during the battles at the Essel bridgehead convinced the British to redeploy their forces farther east away from what they perceived was a strongly held area.
|
 |
|
Back at the Westen bridgehead the Germans conducted a massive counterattack designed to drive the British back over the Aller. This attack was executed on the night of 13/14 April and launched by all available troops in the area. The attack involved both the 5th and 7th Marine Regiments and the Pioneer NCO cadets, as well as other independent formations. The operation commenced around 2300 hours with a preparatory bombardment. The Germans then began a series of determined attacks on British positions that for the most part the British were able to beat off. Despite heavy losses the Germans kept attacking well into the morning. By the time the Germans had exhausted their reinforcements and the British were still well in control of their bridgehead.
|
 |
| The British then took their turn to go on the offensive and on 14 April they began their operation to break out of their bridgehead at Westen. The area around Westen was heavily wooded and the Marines stubbornly held out using this cover to ambush and infiltrate behind the British advance. The British used artillery, flame-throwers, and aircraft to pin the Marines and allow the attacking companies to penetrate the German front line. With the German encirclement at Westen broken, the British could now focus on the last major crossing point that the Germans held on the right bank of the Aller; Verden. |
 |
| As the British advanced out of the Westen bridgehead northeast towards Verden, the Marines and artillery recruits of KG Verden were able to offer local resistance. This slowed the advanced by forcing the British to clear each village along their line of advance. Between 14 and 17 April this was the norm, with the British using artillery and flame-throwers to root out stubborn Marine and army defenders. The city of Verden itself was expected to be heavily defended, but the damage to the German formations from the counterattack on the Westen bridgehead, as well as the resistance they put up over the last few days in the surrounding villages, weakened any further resistance and the Germans withdrew. |
 |
|
Verden was the last strategic vestige of resistance on the Weser-Aller line. From here until the end of the war the Marines and independent formations fighting alongside them could only offer sporadic, but bitter resistance. With no rivers to serve as choke points for the Marines to concentrate their defence, the British could exploit the wide front that over-extended the Marines and made in-depth defence impossible.
|
|
In Flames Of War
You can field this division using the 1st & 2nd Marine-Grenadier Divisions Berlin: German Command Cards.
They had support from various Kampfgruppen that included Luftwaffe FlaK troops, as well as various training school troops which can be also represented using other Formations and Units from the Berlin: German book and command cards.
|
Last Updated On Monday, February 5, 2024 by Kevin
|
|
|