|
|
 |
How To Create Mud Bases
With Ruben Torregrosa
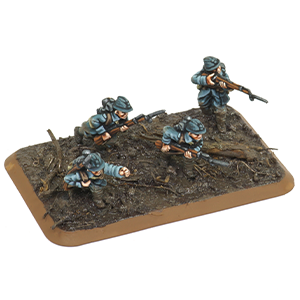
As wargamers, we frequently opt to paint bases rather than create them. While it is true that we usually incorporate some form of texture, often achieved by adhering sand with glue, the subsequent step typically involves multiple layers of drybrushing painting. However, for the sake of achieving more authentic bases and scenery, it is advisable to create the texture entirely instead of relying on painting. A notable example is mud; painting mud effects can be quite challenging, while creating realistic mud effects becomes remarkably straightforward when employing the right tools and techniques and the results yield a hyper-realistic look. In this tutorial, we will explore the process of creating mud bases by applying two different layers of mud. The initial layer involves utilizing an acrylic texture, followed by the application of dedicated enamel products.
|
|
Before embarking on this tutorial, it is important to acknowledge the fundamental differences between acrylic and enamel paints. Acrylics are manipulated with water and dry rapidly, often within seconds, whereas enamels require the use of an organic solvent (such as odourless turpentine or White Spirit) and dry over an extended period, typically hours. It is crucial to note that water cannot be used with enamels. Scale modellers frequently employ enamels to create diverse weathering effects, primarily due to their slow drying time, enabling easy blending and even complete paint removal when necessary.
|
|
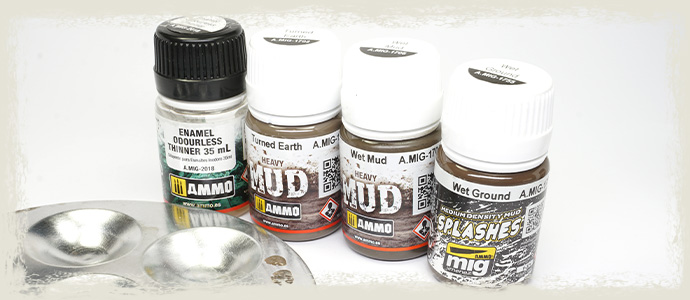
To achieve the mud effects, we will utilize enamel products specifically designed for this purpose. The "Heavy Mud" from AMMO effects, true to their name, are dense paints that we will use to construct the texture while introducing colour, and in some cases adding a glossy finish (wet mud). Conversely, the "Splashes" effects are slightly more diluted, serving not only to create splashes but also to introduce nuances and seamlessly blend with other mud effects, as we will explore in the following steps. The product range encompasses various colours that allow us to attain specific outcomes, mimicking diverse environments. Note that some colours are glossy and therefore perfect to create wet effects (these have the word “wet” on their name). If needed, we can thin down these paints using Enamel odourless Thiner A.MIG-26618, which we also need to use to clean the brushes.
|
|
|
|
Mud effects on miniatures
|
|
Step 1: Preparation
|
|
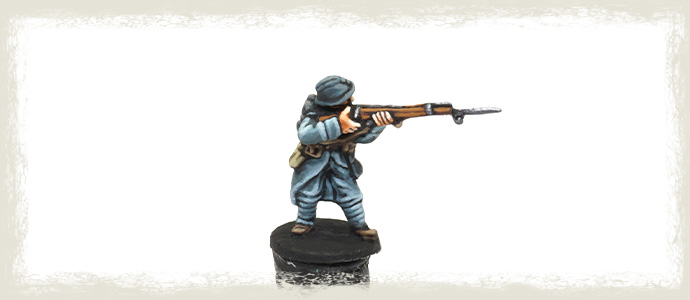
We begin painting the miniatures of the base fully, adding all the shadows, highlights, and intricate details using our preferred technique. That is, "battle-ready”. Here, I followed the so-called “base, wash and highlight” technique, complemented by multiple additional layers of highlights to achieve even more contrast and definition. It is advisable to apply mud effects to the miniatures individually before gluing them onto the base. At this stage, we have easy access to all parts of the miniatures. Once glued onto the base, accessing certain areas can become challenging.
|
|
|
|
Step 2: Dry Mud
|
|
We start creating the mud effects by building a textured surface using dense enamels from the "Heavy Mud" range. To achieve a dynamic or temporal effect, we can apply a lighter colour to the upper parts, simulating dry mud, while employing a darker hue to replicate wet mud in the lower areas. Starting with Heavy Mud Turned Earth A.MIG-1702, a light mud colour, we use an old brush and employ a stippling motion to generate a rugged texture. Our focus is on creating a coarse surface, concentrated on specific areas such as the upper legs, knees, elbows and the lower to mid-section of the coat.
|
|
Step 3: Wet Mud
|
|
Next, we replicate the same process using a darker and glossy enamel, like Heavy Mud Wet Mud A.MIG-1705. We concentrate on the lower sections of the legs and coat. It is worth noting that if certain effects are not to our liking, we have the option to effortlessly remove the enamels by using a brush dampened with Odourless Enamel Thinner.
|
|
Step 4: Blending Mud Effects
|
|
To enhance the cohesion of the mud effects, we can blend the dry and wet textures using an intermediate colour and a more diluted paint. In this case, Splashes Wet Ground A.MIG-1755 (a medium-density mud effect) serves this purpose. Applying this product, just like the previous ones, to the transitional areas allows us to merge and harmonize the various colours and textures effectively. Furthermore, this enamel is glossy, enhancing the wet effects.
|
|
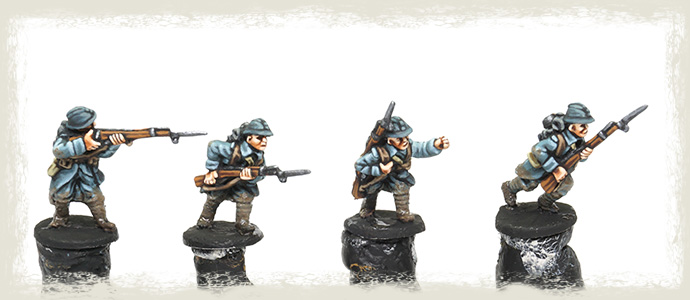
To optimize our time, we simultaneously apply these effects to the entire batch of miniatures, whether it is a set for a single base or the entire platoon (it depends on how big batches you usually handle). Introducing subtle variations among the miniatures enhances realism. For instance, you might opt to emphasize dry effects on the knee of one miniature, while focusing more on wet effects for another, thereby introducing a nuanced diversity within the group.
|
|
|
|
Step 5: Fix Miniatures Onto The Base
|
|
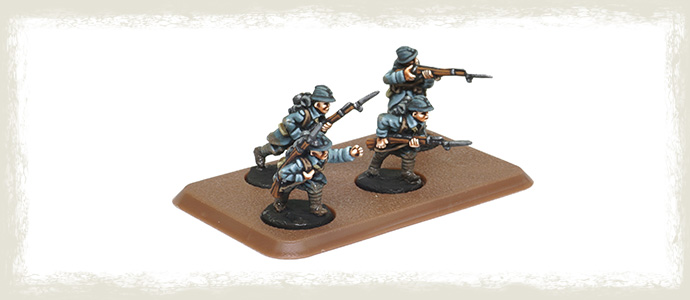
Once we are satisfied with the mud effects on the individual miniatures, we are ready to fix them onto the base using instant glue. If feasible, consider arranging the miniatures in a way that tells a cohesive story. Optimize the positioning of each miniature to showcase its unique characteristics. For instance, kneeling miniatures are best placed at the front to prevent them from being obscured by the frontal row if positioned at the back. Additionally, aim to avoid replicating the same miniature in identical positions across different bases, fostering variety and visual interest.
|
|
|
|
Mud Effects On The Base
|
|
Step 1: Materials
|
|
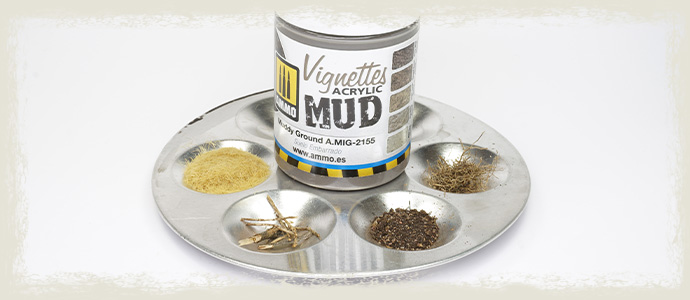
To create the first mud layer, we will utilize an acrylic texture. These products prove highly convenient, enabling the creation of both texture and colour with a single brush stroke. For a wet mud effect, a glossy texture like Muddy Ground A.MIG-2155 can be employed. Acrylic textures are mixable with other acrylic paints, offering flexibility in colour adjustment. For instance, to achieve a darker mud shade, one can blend Muddy Ground with a dark brown paint, as we will do here. Additionally, the texture can be enhanced by incorporating other materials such as electrostatic grass, sand, grass roots, and even small branches.
|
|
|
|
Step 2: Mixing The Ingredients
|
|
We mix all the materials using an old brush and a small amount of water to enhance fluidity until we obtain a homogeneous mix. In this instance, we incorporated a substantial quantity of dark sand and grass roots (previously broken down into small pieces), along with a touch of electrostatic grass. Additionally, for a deeper mud shade, we added a bit of Dark Brown F-533. The proportions of each component are contingent on the desired final results, and it is recommended to conduct a few test runs before applying the mixture to the actual bases.
|
|
Step 3: Covering The Base
|
|
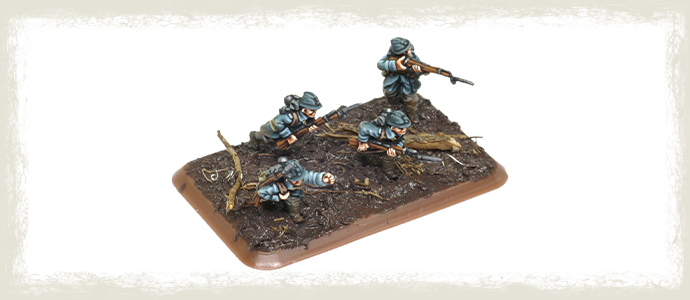
We apply the enhanced acrylic texture across the entire base using a brush. A smaller brush can be employed to carefully add texture around the miniatures, although in this instance, it is acceptable if the miniatures are partly covered, as it contributes to the natural integration of the mud effects.
|
|
Step 4: Adding Details
|
|
While the acrylic texture is still wet, we have the opportunity to incorporate additional elements, introducing more variation and points of interest to our base. For instance, small branches can be utilized to depict remnants of trees, while thin wires can simulate barbed wire. These two elements, branches and wire, are particularly advantageous as they require no additional painting—they already possess ideal colours. Additionally, traces from the grass roots processing can be integrated for added realism. We simply press them gently onto the acrylic texture using twicers. We let it dry for at least one hour.
|
|
|
|
Step 5: Dry Mud
|
|
Transitioning to enamel paints, we begin the creation of the second layer of mud. The objective is to enhance the mud effects, introducing more subtleties and realism. To maintain coherence with the colours and textures used on the miniatures, we are going to use the same three enamel products. We commence with the light (dry mud) enamel, Heavy Mud Turned Earth A.MIG-1702. We apply it with a brush using a stippling motion here and there, particularly on elevated parts where dry mud would naturally accumulate.
|
|
Step 6: Wet Mud
|
|
Likewise, we employ a darker enamel, Heavy Mud Wet Mud A.MIG-1705, to replicate wet effects in the recessed areas. The application method remains consistent, utilizing a stippling motion. Additionally, we deliberately cover portions of the wire and branches with these products, ensuring their integration into the base.
|
|
Step 7: Unifying Mud Effects
|
|
Finally, mirroring our approach with the infantry, we employ a medium-tone and more diluted enamel, Splashes Wet Ground A.MIG-1755, to harmonize the various effects. This paint is applied in the transitional areas, employing a stippling technique to partially blend the other enamels together.
|
|
Step 8: Base Rim
|
|
The enamels will fully dry after a few hours. Following this, to complete the painting process, we paint the base's rim using any chosen colour with acrylic paint. Consistency in this colour across the entire army adds a touch of coherence to the overall presentation.
|
|
With these steps, we have successfully crafted mud effects by combining acrylic and enamel products, achieving remarkably realistic results. The versatility of these products and colours allows for a variety of effects, and you can even experiment with other scale modelling materials like pigments to achieve ultra-dry mud effects. The possibilities for customization and creativity are vast, offering a dynamic approach to enhancing the realism of your miniatures and dioramas.
~ Ruben
|
Last Updated On Tuesday, January 16, 2024
|
|