|
|
 |
|
|
La Nueve's Light Support
 |
Genesis of an Army:
La Nueve's Light Support
By Mike Haught
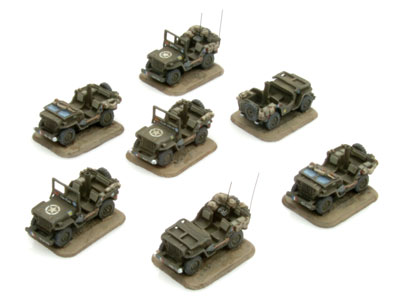
I wasn't feeling very well earlier this week, so I wasn't able to get behind a lot of painting. I did, however, manage to get bulk of the work done on some jeeps. I pulled out all the little vehicles and then set to work on researching the markings that go on them.
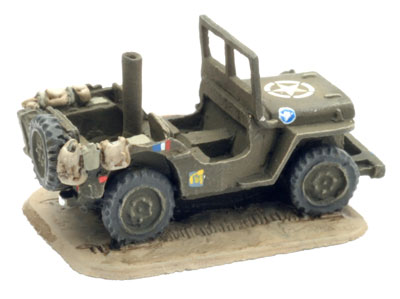
The one thing that really struck me about the 2éme Division Blindée was the sheer amount of markings they used compared to their American and British counterparts. Lorraine crosses, French flags, tactical symbols, names, serial numbers and the 2DB insignia decorate the French vehicles.
|
|
Research
So the first task was to find out what each of the markings meant and where they were placed. I found a couple of very handy websites that had a lot of information and detail.
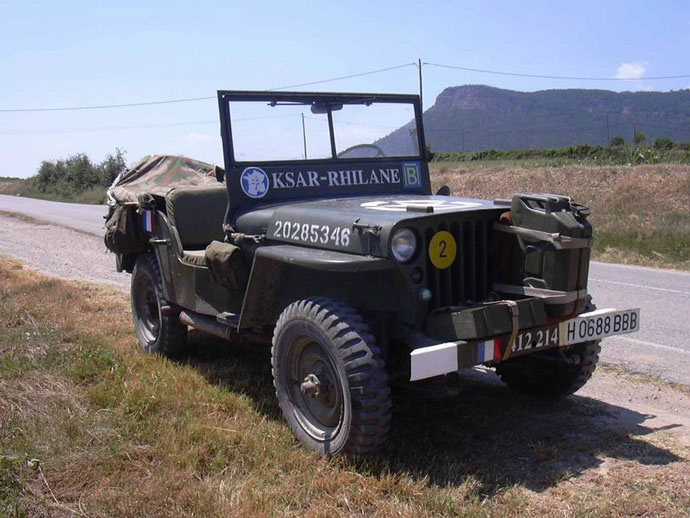
The first is La 2e Division Blindee Historique de Leclerc (http://2db.free.fr/, in French). This website provides a lot of excellent full color pictures that are useful for adding detail to your 2DB miniatures. The pictures include several refurbished WWII vehicles that were used by the French during the war. Specifically of interest to me this week was the jeeps that were featured which revealed a lot of the markings. The one thing that I noticed was that there were some ‘proper’ places for some markings, such as the French flag and serial numbers, but there were exceptions and variations.
|
 |
|
After sifting through those pictures, I moved on to www.souchman-home.com which is a website (again in French) that goes into detail about the tactical markings as well as suggesting the known names for vehicles in specific battalions.
There are several other sites, but these two were the most helpful and I kept them both close at hand on my laptop as I began working on the jeeps. Next week I hope to put together a little more information on markings, but for now I’ll stick to the jeeps.
|
|
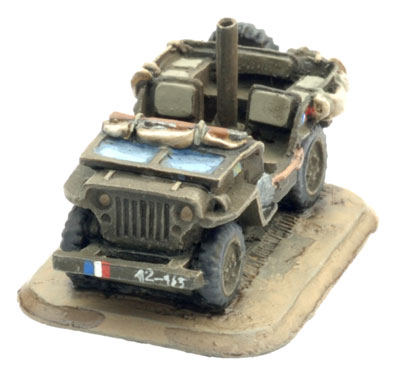
Flags
The first thing I painted onto the jeep was the Spanish Republican flag onto the base of the windscreen on the left-hand side. This was blatant artistic licence on my part. I wanted to add something to the vehicle that was obviously Spanish and I thought that a flag (similar to the common French ones) on the windscreen would be a nice touch.
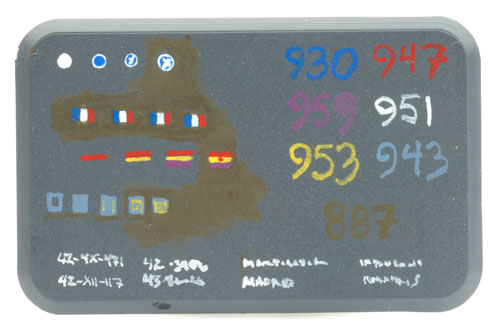
For the flag I painted three lines. The first I used Artilery red (FWP380), the middle was Cavalry Yellow (FWP361) and the last was Purple (VP959). Once the lines were drawn I cleaned it up with Sherman Drab (FWP321) to square the edges. Finally, I added a small Red dot in the center, representing the crest.
|
 |
I did the exact same thing for the French flag insignia using Infantry Blue (FWP400), White (FWP301) and Artillery Red. There were a lot of flag insignias on each the jeep. I tried to put one on all sides except the back.
|
 |
Lettering & Numbering!
I decided that my detail prowess was not going to let me try for vehicle names on the jeep windscreens, but I thought I would have a crack at least making them look like lettering. Maybe in the future I’ll hone in my micro-writing skills, but given the time crunch I’ll have to settle for gobbledigook jeep names such as: “FURGLE FHAT” “GHJK &G$#” and “HJG ASR H*U%”. No matter, however, because I only have three jeeps with the windscreen up.
The same applies to the serial numbers, I tried to have some recognisable digits, but really a lot of those too turned to gobbledigook.
|
|
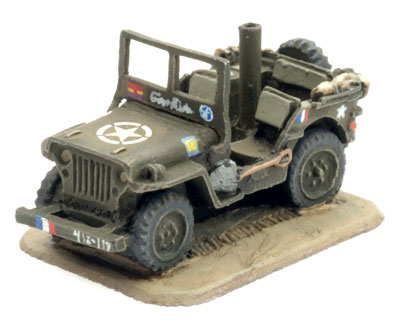
Tactical Markings
The 9th Company used the L'infanterie Blindée tactical marking. As with the numbers I went with the “hint of symbol” approach and tried to best approximate a “B” with lines around it. Some tactical insignias worked, others less so, but that was alright and I was happy with the result.
|
 |
 |
I began with a box painted with Luftwaffe Blue (FWP401). Then, I drew two Dark Yellow lines on either side of the box and one across the top. Then I attempted the “B” in the middle with varying success. Still, I was again happy with the way they turned out. I painted two of these symbols on each jeep: one on the hood (or bonnet) just in front of the driver. The other somewhere on the passenger’s side panel.
There is one more that goes on the front of the vehicle in the upper left next to the headlight. I plan to cut small squares from a piece of paper or use plastic from a blister and glue them into the grill and then add the insignia. I just haven’t yet quite worked up the attention and patience required!
|
|
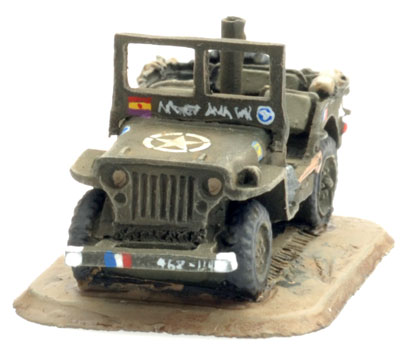
2DB Insignia
The 2éme Division Blindée make copious use of the 2DB insignia on all of its vehicles. These markings, more than anything else, identify the vehicle as a member of the division. I’ve added the insignia on the windscreen, opposite the Spanish flag. I put another opposite the tactical marking on the hood (bonnet) in front of the passenger seat.
I thought this insignia was going to be the most difficult, but it was actually surprisingly easy. I began with a White dot, about a 1/16” (1.5mm) across. Then I partially filled it in with Dark Blue. Once dried, I added a small White “X” in the middle and then expanded the center a bit and the lower left-hand and upper right-hand arms of the “X” to the edges. The goal was to make it look like a little miniature France.
|
 |
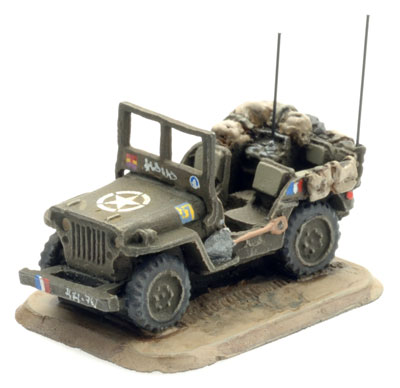 |
Aerials
Finally I needed to add aerials to a pair of jeeps. I’ve done aerials in several ways over the years. Initially, I used guitar or piano wire, but these proved too rigid and often poked me as I tried to grab the vehicle. Next I used very narrow-gauge wire that is used with floral arrangements. It was a soft lead wire that would bend instead of poke. You can get the same wire out of a twist-tie if you tear away the paper or plastic. I’ve even heard of people who use cat whiskers! But, I’ve never done that,… that's just plain gross!
|
| In the end, I went to my local hardware store and bought a broom with plastic black bristles. I popped a group off and cut them to size. I drilled out the aerial mounts, dip the bristle into a small drop of glue and popped it on the model. Done! |
 |
Wrap-up
I added the star insignia from the US decal sheet onto the hood. I also added a few small hand-painted stars on the rear quarter-panels of each jeep, provided that the stowage didn’t cover it up!
Then, to unify the jeep together I used a 10% Brown Violet to 90% water wash all over the vehicle. This helps to tone down the vehicle’s markings and bring everything together.
There you have it! More than you’d ever want to know about painting French jeeps! I've included my practice base with a few step-by-step insignias. Hope it is helpful!
Now onto the other vehicles!
|
|
List of Vallejo Paints Used for Markings:
• Artillery Red (FWP380)
• Cavalry Yellow (FWP361)
• Purple (VP959)
• Infantry Blue (FWP400)
• White (FWP301)
• Whitewash (FWP307)
• Sherman Drab (FWP321)
End of Week 6!
Well, there is only a few weeks remaining and there's still a lot to do. I have my infantry still to do as well as the markings on the remaining vehicles. Now that I have a process for detailing, they should be a breeze to finish up. The infantry is another story!
|
 |
|
|
|